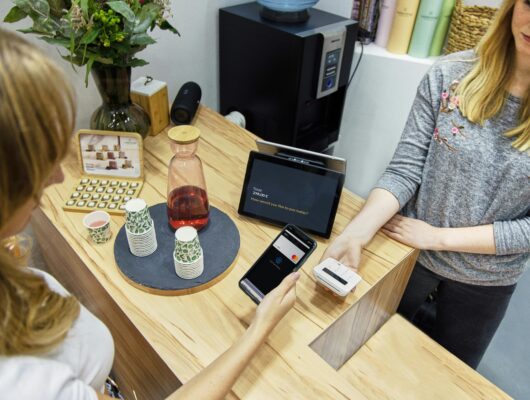
A sales manager at a growing services company told us the same story many teams face: leads were coming in, but booking a simple discovery call became a back-and-forth chain of emails. The team tried calendars, forms, and scheduling links, yet nothing connected cleanly to their website or their internal workflow. The real tension wasn’t “how do we schedule,” but how do we schedule without creating admin work.
This article answers one practical question: How to Create Appointments in Odoo 19 so prospects can book a free consultation directly from your website—while your team controls availability, reminders, and booking rules from the backend.
Key terms you’ll see when you create appointments
- Appointment Type: A reusable “service template” that defines what is being booked (title, duration, location, rules).
Example: “Free Odoo 19 Consultation – 60 minutes – Online Meeting.” - Availability: The time windows customers can choose from on the booking calendar.
Example: Monday–Friday, 9:00–12:00 and 13:00–16:00. - Capacity: Whether a user can accept multiple bookings in the same time slot.
Example: Capacity set to 1 for one-on-one consultations. - Booking Questions: Custom fields added to collect information before the meeting.
Example: “Which Odoo module do you use?” as a dropdown list. - Automated Communication: Confirmation, cancellation, and reminder messages triggered by booking actions.
Example: Email confirmation immediately + reminder 2 hours before. - Booking Rules: Constraints like minimum notice, cancellation policy, and time zone handling.
Example: Minimum 24-hour notice and time zone set to America/Chicago.
Why scheduling breaks in real businesses (and what it costs)
When companies don’t standardize scheduling, they usually rely on manual coordination. The problem is not only time—it’s inconsistency. Different team members share different links, ask different qualification questions, forget reminders, or accept meetings outside working hours. Over time, it becomes a silent revenue leak.
Example 1: IT services & implementation
An ERP or IT consulting firm often offers a “free consultation” to qualify leads. Without a structured system, consultants get double-booked, prospects show up without context, and sales cycles slow down. The biggest consequence: high-intent leads drop off because booking feels difficult or unprofessional.
Example 2: Manufacturing B2B support and after-sales
A manufacturer offering technical support calls might need to route bookings to the right specialist and collect details upfront (machine type, serial number, issue category). If these questions are missing, each call starts with 10 minutes of discovery. If reminders are missing, no-shows rise and support capacity is wasted.
A practical framework: create appointments from the website, manage logic in the backend
The most effective way to implement scheduling in Odoo is to separate two responsibilities:
The website handles the user experience (select a date, pick a slot, fill a form). The Appointments module controls the logic (availability, questions, communication, and booking rules). This is exactly the workflow you follow when learning How to Create Appointments in Odoo 19.
Step 1: Create the booking page from the website (fastest starting point)
In Odoo 19 Website, switch to edit mode. From the top menu, click New and select Appointment Form. Odoo automatically creates an appointment type in the background and links it to the page you’re building. You’re still designing visually on the website—but the “appointment object” already exists in the Appointments app.
Step 2: Configure the appointment type in the Appointments module
Now go to the backend: open the Appointments module and find the newly created appointment. This is where you refine every operational detail:
- Title: Set a clear, business-friendly name (e.g., “Free Odoo 19 Consultation”).
- Duration: Define slot length (e.g., 60 minutes).
- Location: Choose “Online Meeting” for virtual calls, or physical location for on-site visits.
- Assigned user(s): Connect the appointment to the consultant or salesperson who will host it, ensuring it syncs with the right calendar.
- Capacity management: For one-on-one calls, set it to allow only one appointment at a time.
Step 3: Set availability that matches how your business really works
In the Availabilities tab, define bookable days and time ranges. These windows directly control what visitors see on the booking calendar. A practical pattern is to open mornings and afternoons on weekdays, while keeping internal focus blocks unavailable.
Step 4: Add booking questions to qualify leads before the meeting
In the Questions tab, create a short set of questions that reduces discovery time and improves meeting quality. For example:
- Phone number (mandatory, text)
- Which Odoo module are you using? (dropdown)
- What do you need help with? (text or multiple choice)
These questions appear on the website booking form and give your team context before the call starts. It’s a simple but powerful step when implementing How to Create Appointments in Odoo 19 for sales or support.
Step 5: Automate confirmations and reminders to reduce no-shows
In the Communication tab, Odoo can automatically send booking confirmation emails and cancellation emails. You can also configure reminders—email a few hours before, and optionally an SMS reminder closer to the appointment time. Once set, this runs without manual follow-up.
Step 6: Define booking rules (where most scheduling tools fail)
In the Options tab, you can control the rules that protect your team’s calendar:
- Auto-confirmation or approval-based booking
- Advanced booking limit (how far in the future people can schedule)
- Minimum notice (prevent last-minute bookings)
- Cancellation policy
- Time zone (critical for cross-region scheduling)
Time zone is especially important for distributed teams. If your business runs on America/Chicago but you serve global clients, correct time zone settings avoid missed meetings and frustrated prospects.

Streamline Success: Why CRM for IT Companies is Key in Business Optimization
Introduction This article explores how CRM (Customer Relationship Management) systems, specifically tailored for IT companies,…

CRM for Construction Companies | Streamlined Solutions by ERPixel

How to Optimize Manufacturing Production Scheduling with Odoo ERP
How to Use Manufacturing Production Scheduling Software with Odoo Introduction Are you still manually managing…

Why Open Your eCommerce Business with Odoo?
How Odoo POS Software Drives Small Business Success in the USA and UK

Odoo CRM Deep Review: A Comprehensive Guide for Entrepreneurs
Step 7: Publish and test the end-user booking flow
Return to the website and open the live booking page. The visitor experience should be simple:
- Select a date
- Choose an available time slot
- Fill in email/phone and answer your questions
- Click Confirm Appointment
After confirmation, Odoo schedules the meeting, sends the right emails, triggers reminders, and blocks the slot on the calendar. This is the “full loop” that makes How to Create Appointments in Odoo 19 a business process—not just a form.
Conclusion: the simplest way to answer “How do we let customers book us?”
If your goal is to stop scheduling chaos and turn bookings into a reliable workflow, the direct answer is: How to Create Appointments in Odoo 19 is to build the appointment page from the website, then manage all logic—availability, questions, communication, and rules—inside the Appointments module.
When implemented properly, you reduce admin effort, increase show-up rates, and improve the quality of every consultation or support call. If you want help tailoring this to your sales process, team calendars, and website structure, ERPixel can implement and customize the Odoo Appointments flow end-to-end as an official Odoo Partner. Contact ERPixel for Odoo development and implementation support to launch a booking experience that feels seamless for customers and scalable for your team.